How to Scan Documents to USB using Nashuatec Multi-Function Printers
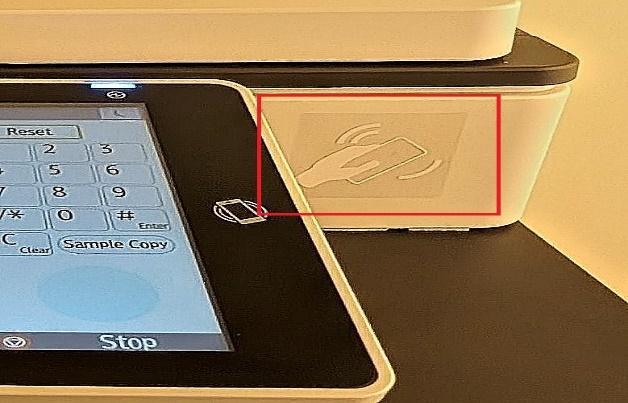
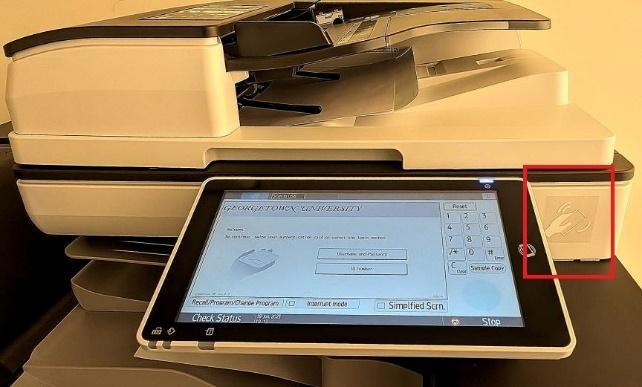
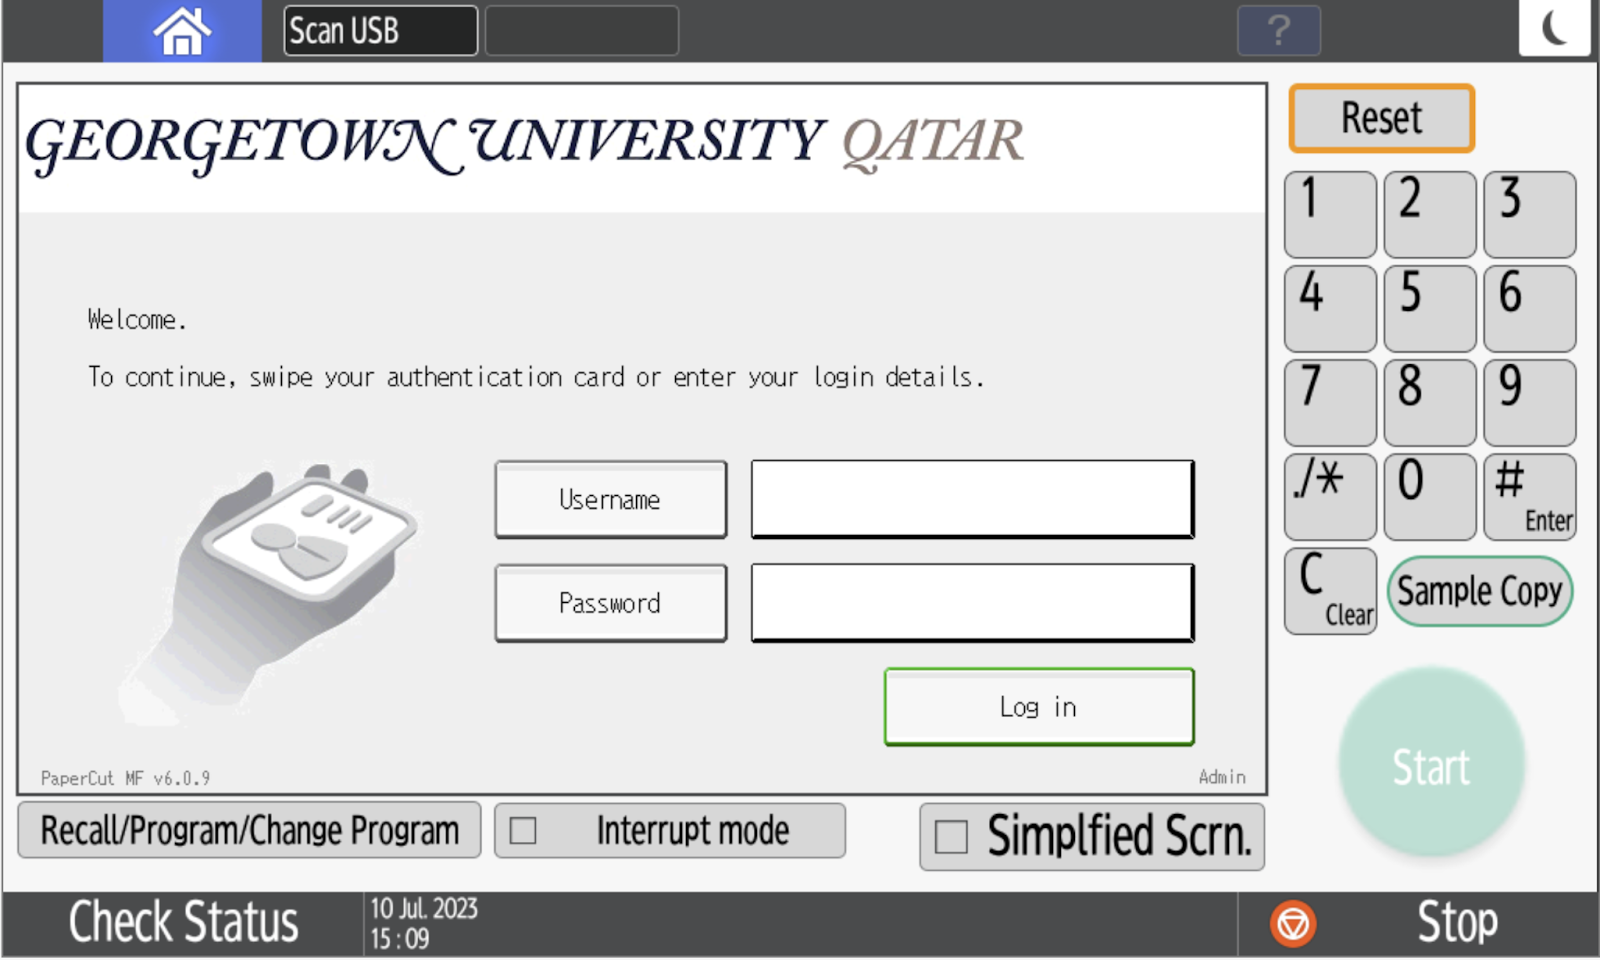
1. Login to the Nashuatec multi-function printer using your NetID and password, or authenticate by tapping your NFC-enabled physical GU-Q ID card.
2. Select / touch “Scan USB function next to home button”.
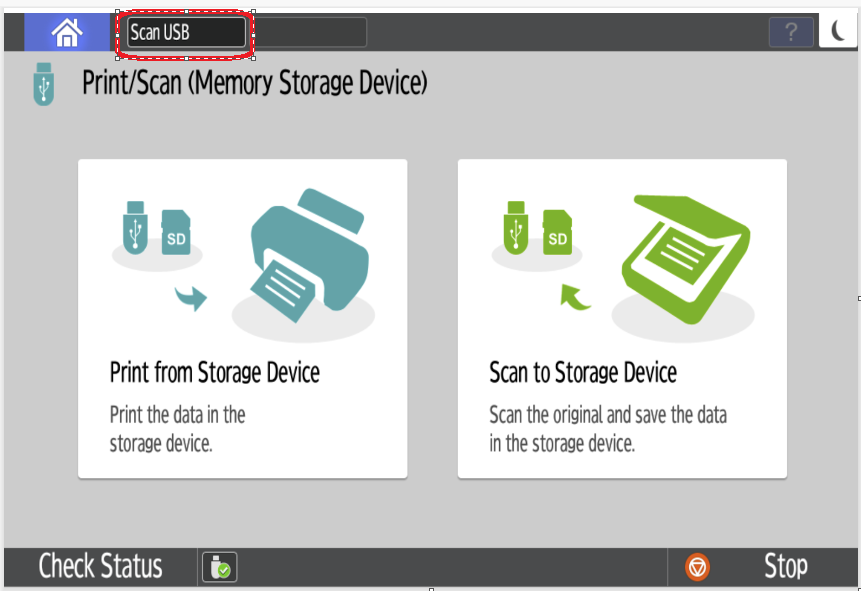
3. You will get this screen
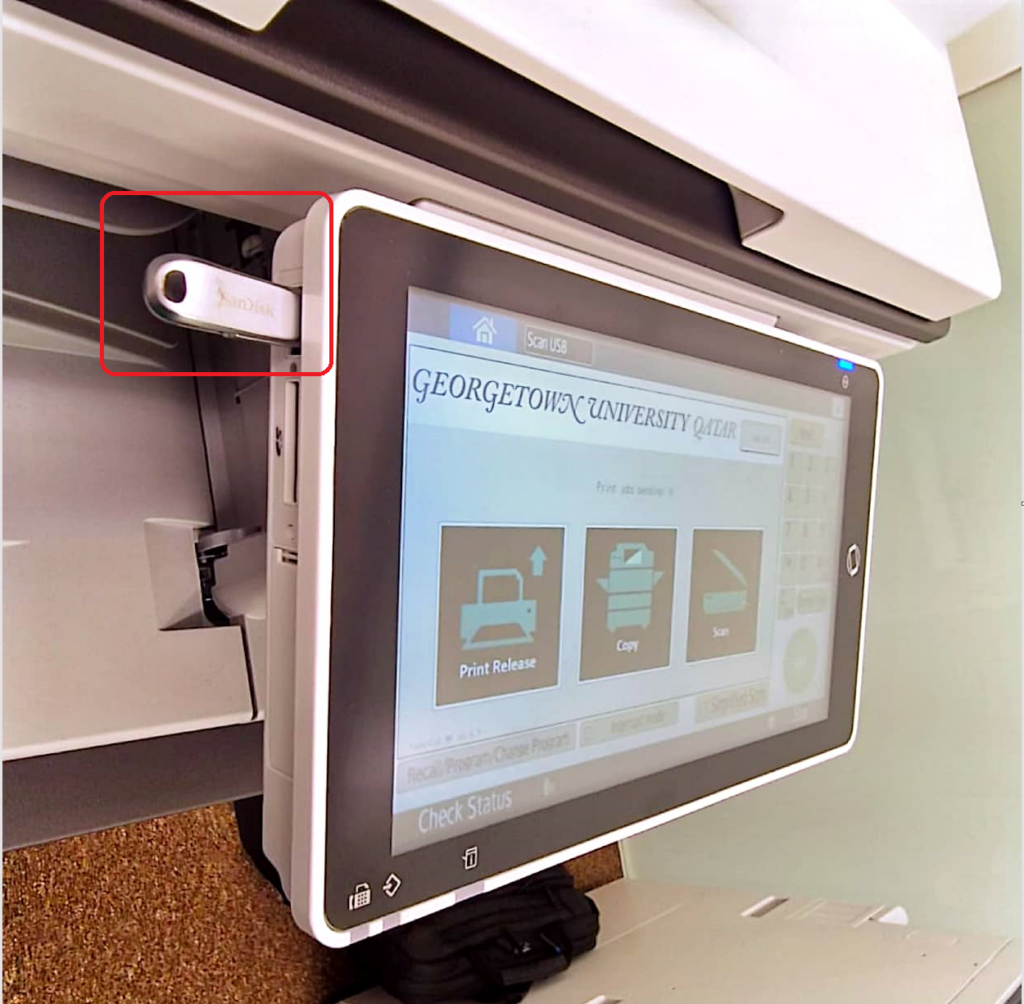
4. Connect the USB to the printer
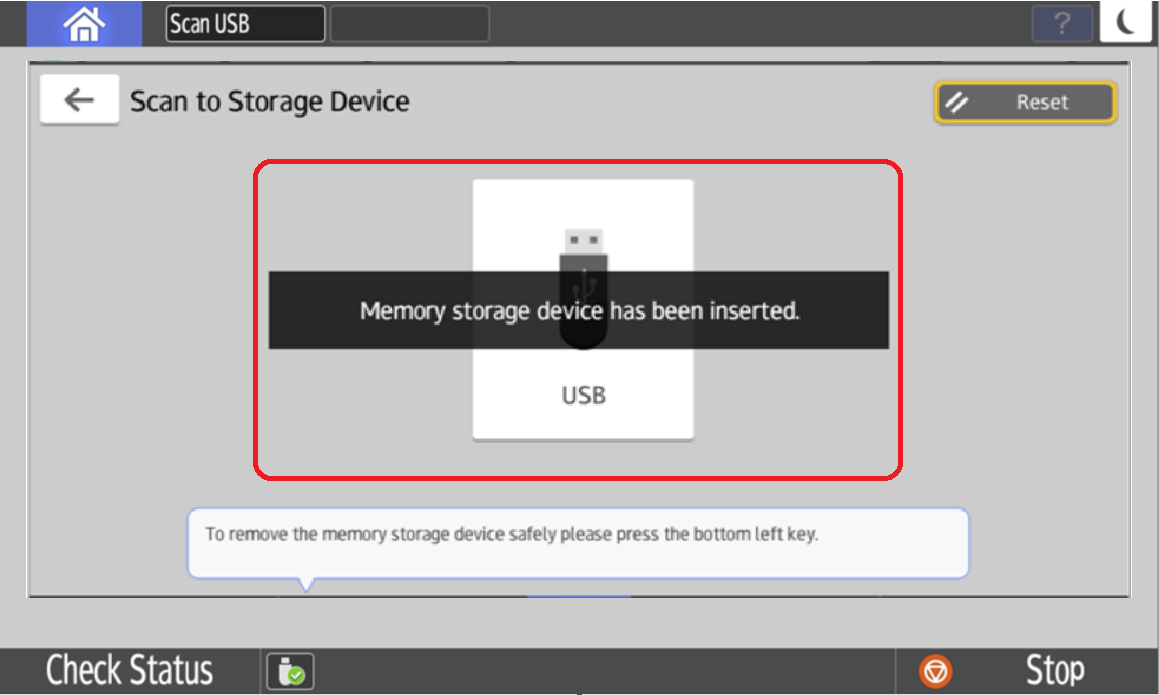
5. Select your memory storage device (USB)
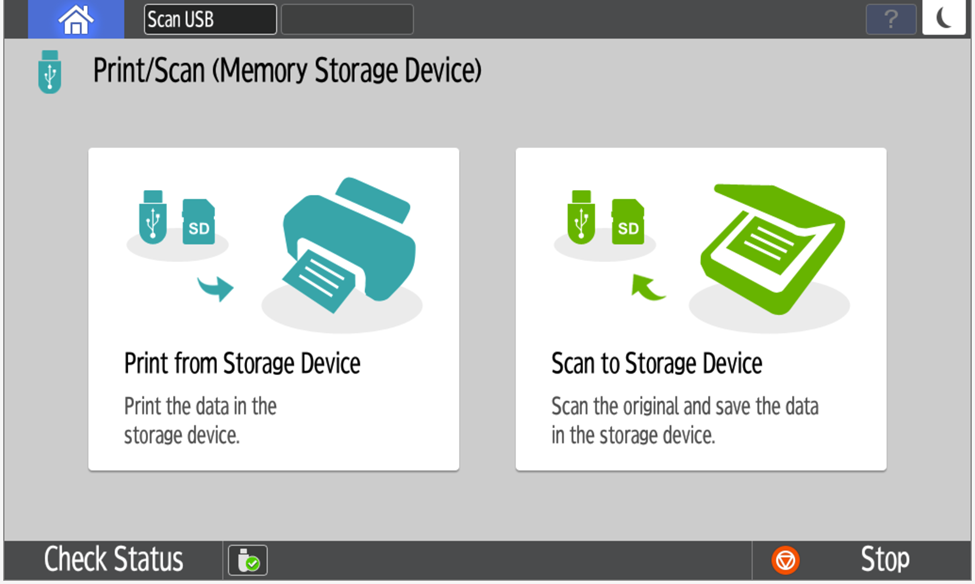
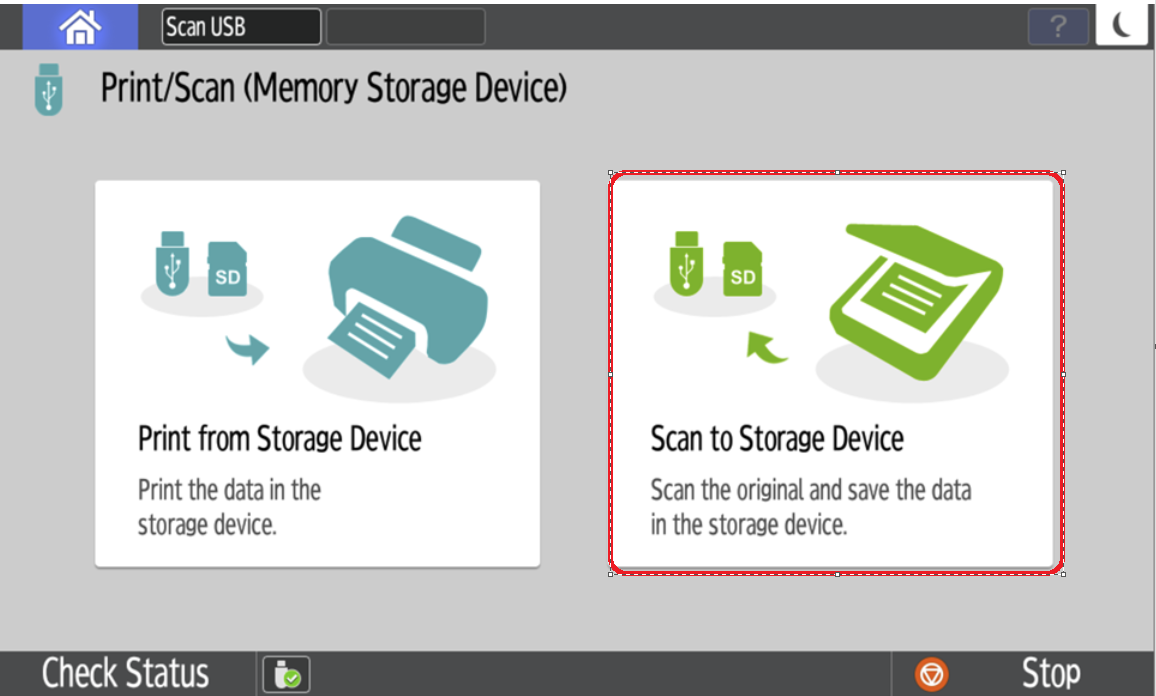
6. Select “Scan to Storage Device”.
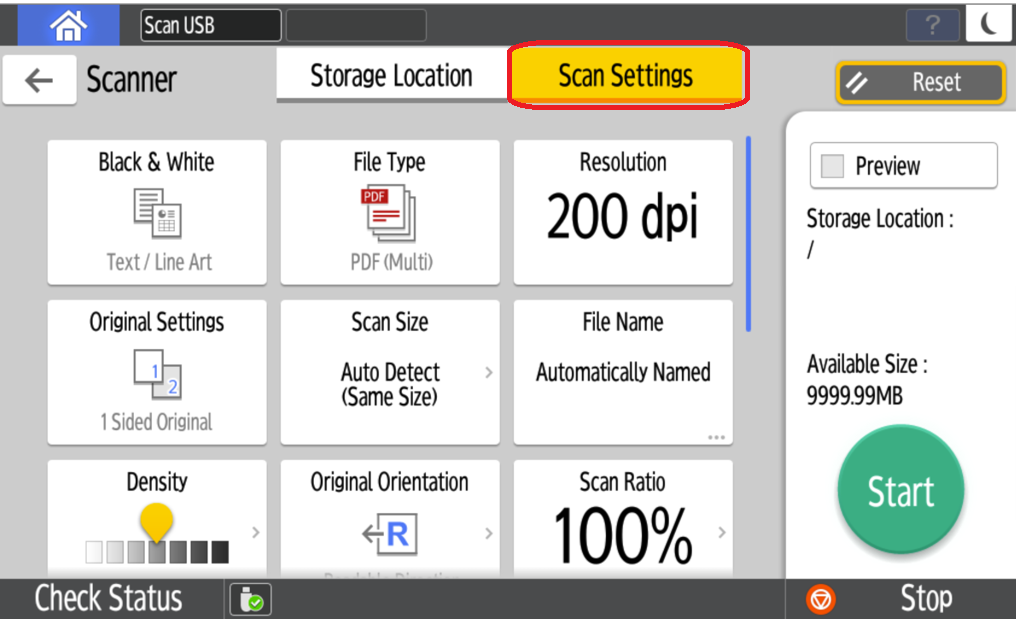
7. Select the location to store your file on Memory device (USB). Available space will be displayed above the Start button.
8. Press / select “Scan Settings” to adjust your scan (e.g. colour / b&w, resolution, file name, etc.).
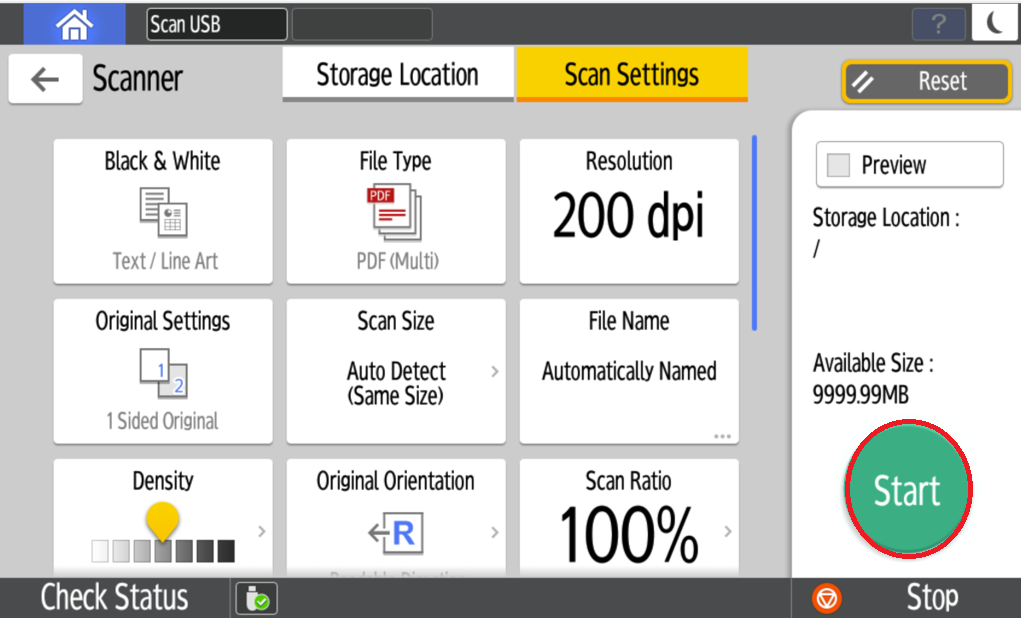
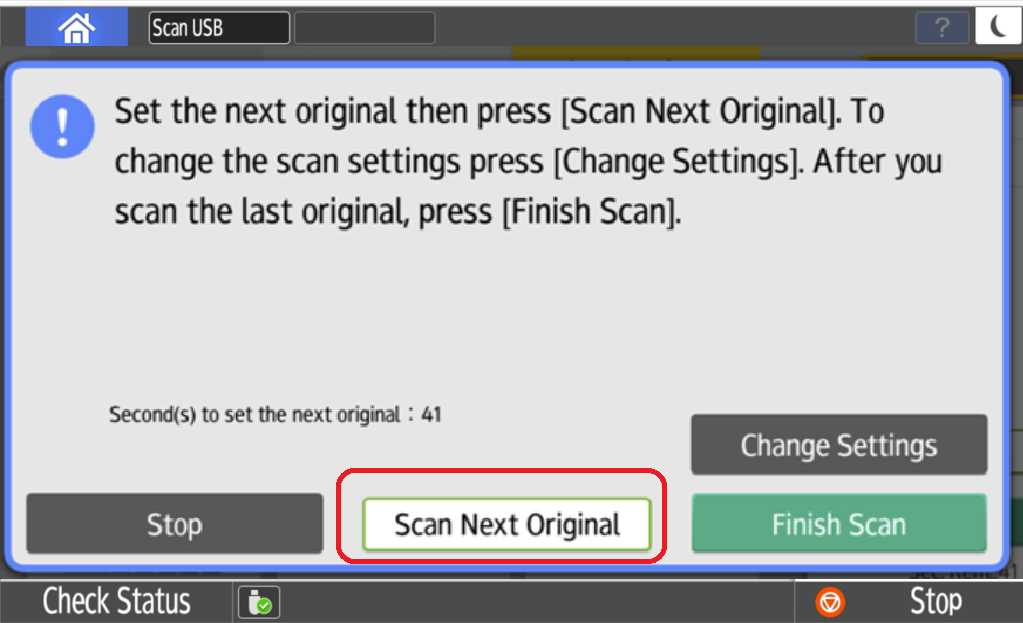
9. Put the document to be scanned on the glass. Press “Start” in the green circle to begin the scan. Put other sheets to be scanned on the glass required and press “Scan Next Original”, or press “Finish Scan”.
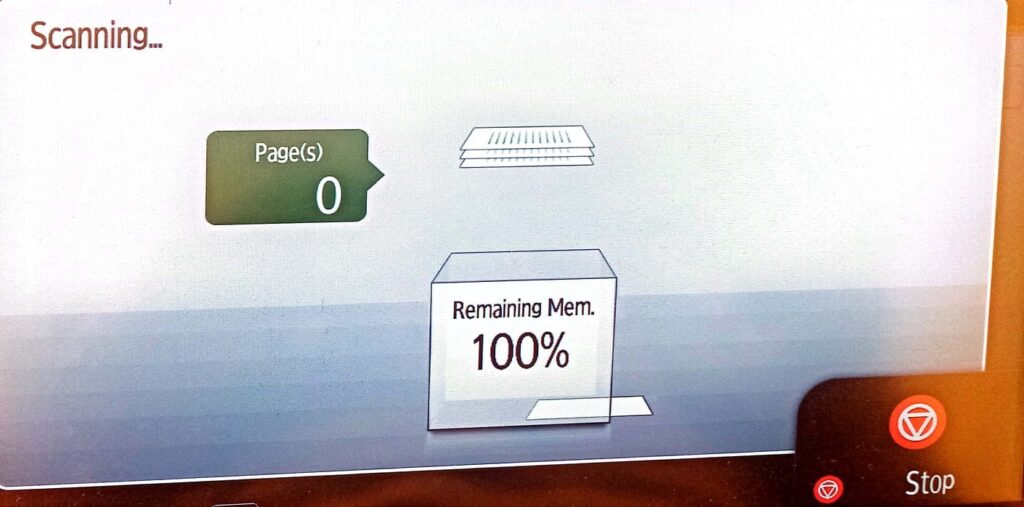
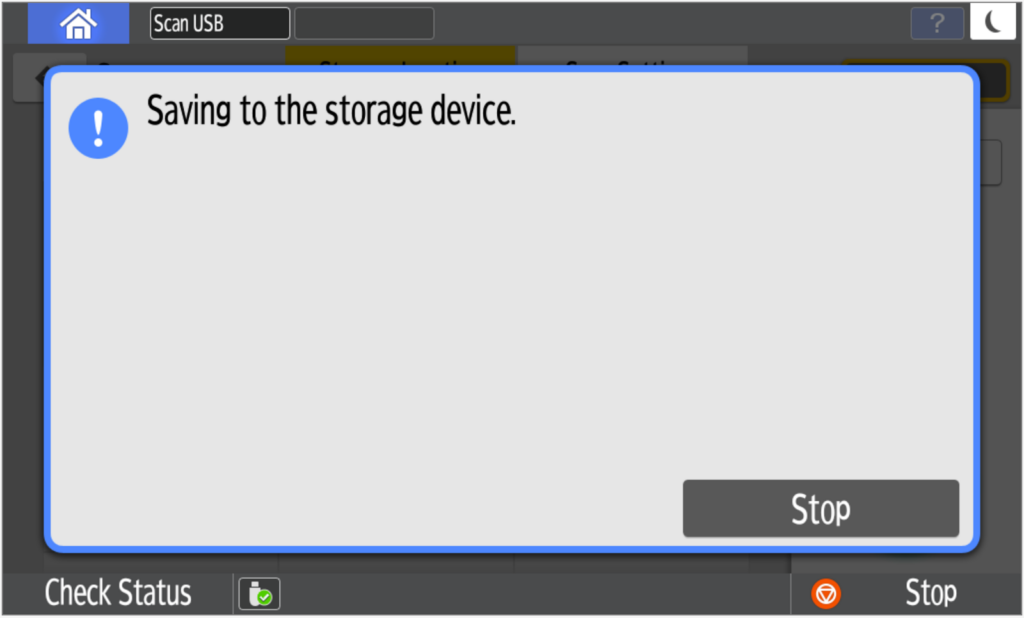
10. Now it will show the progress
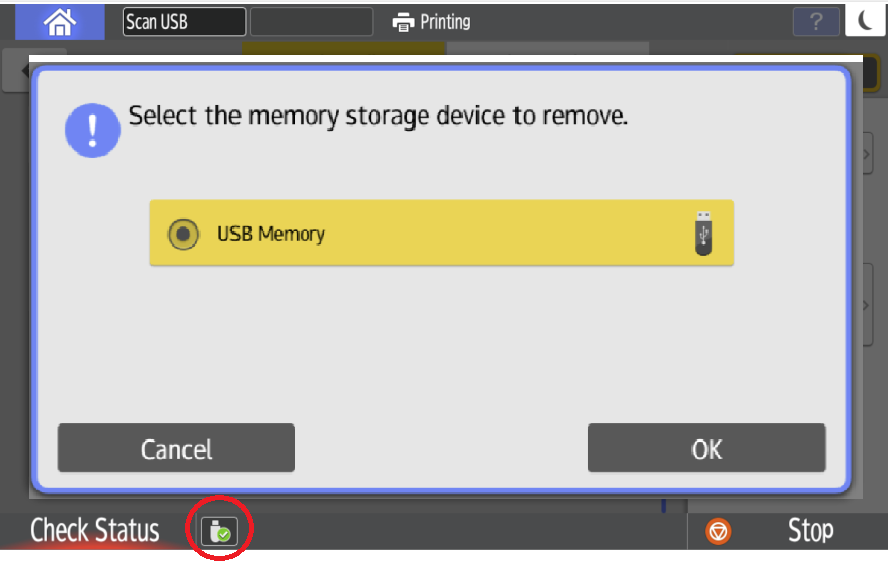
11. When you are finished, eject the memory device (USB) by pressing / selecting the Eject Icon at the bottom left side of the screen.
12. Safely remove the USB / thumb drive by pressing “OK” and ejecting the drive.